Action Tracker WEB User Manual English
Instructions for using the web version of the Action Tracker system
- Action Tracker WEB Notifications
- Authorization in the system
- Performing check-in / check-out
- Marking the beginning of the work day
- Marking the end of the work day
- Marking the beginning of the break during work time
- Marking the end of break during work time
- User profile
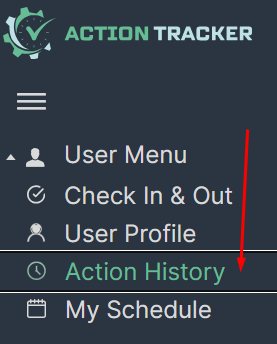
- Action History
- My Schedule
Action Tracker WEB Notifications
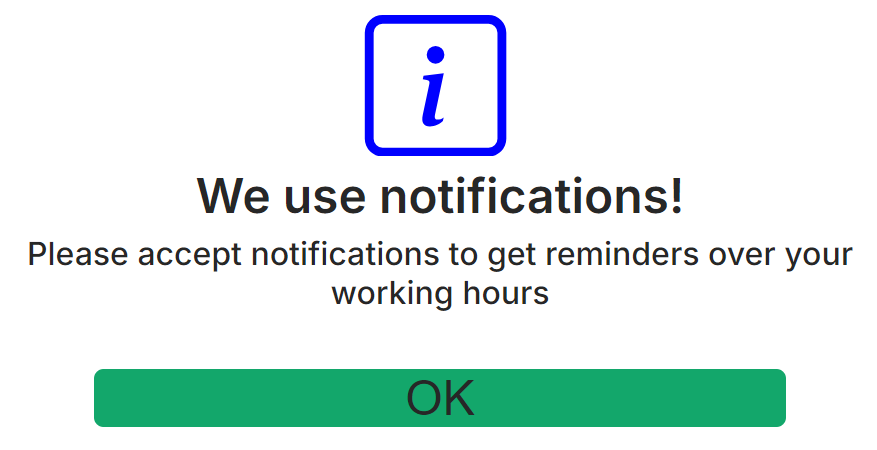
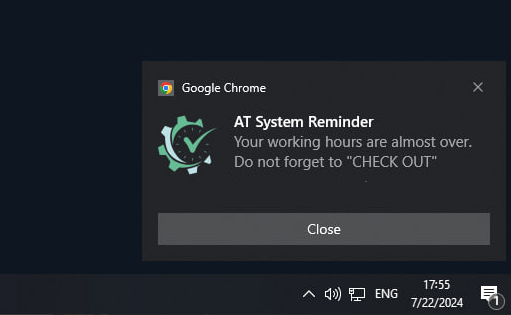
To improve the user experience of the Action Tracker system, our team has added a notification feature that will be displayed on your PC when you need to perform a Check IN/Check OUT or Pause Stop. Upon logging into the system, you will be prompted to enable this functionality:
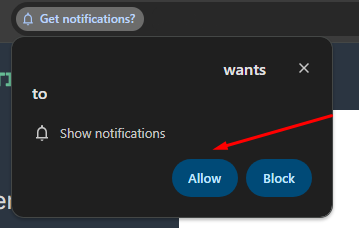
After pressing the OK button, your browser will prompt you to enable notifications from the website a-tracker.net:
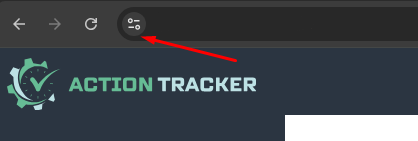
If for any reason this did not happen, you can manually enable or disable the notification feature in the website settings:
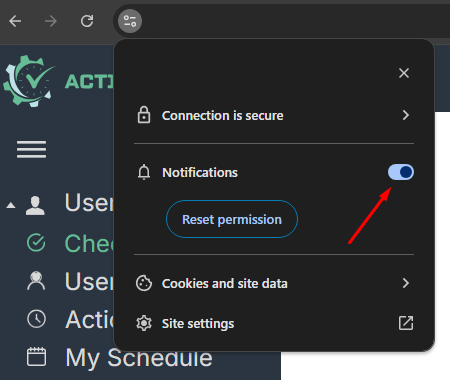
Once you have configured notifications, the system will be able to send you reminders to perform Check IN or Check OUT as needed.
Authorization in the system
- Go to the a-tracker.net website.
- Use a corporate Google account for authorization.

- If you have multiple authorized Google accounts, you will be asked to choose which one to log in with. Select the email you received invitation to the system to or your primary corporate account.

- After successful authorization, you see the main page of the system.

- Before checking in, check the correctness of the specified user data, working schedule, and work time zone. You can do it in User Profile section. If the data is incorrect, contact support: support.team@a-tracker.net, or make request to change your data using Request Data Change button.
User data contains:
1) Full name,
2) Nickname,
3) Email address (one or more),
4) Management info.
Performing check-in / check-out
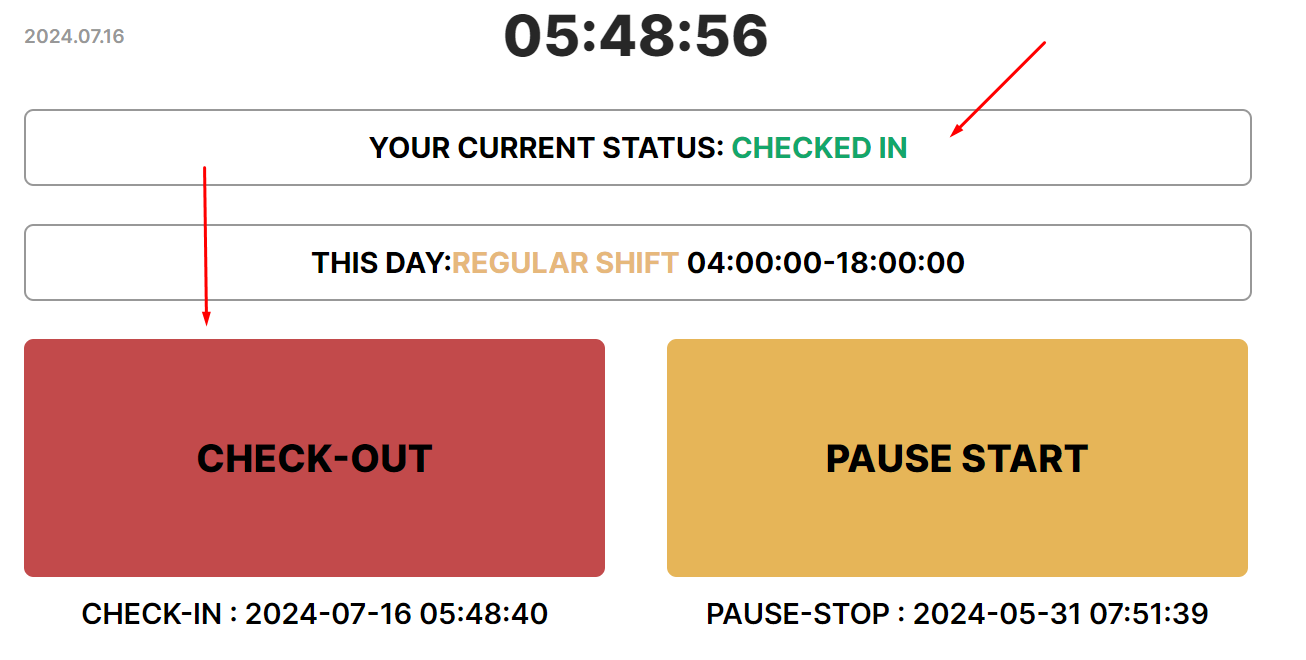
Marking the beginning of the work day
Perform check-in to mark the beginning of the working day
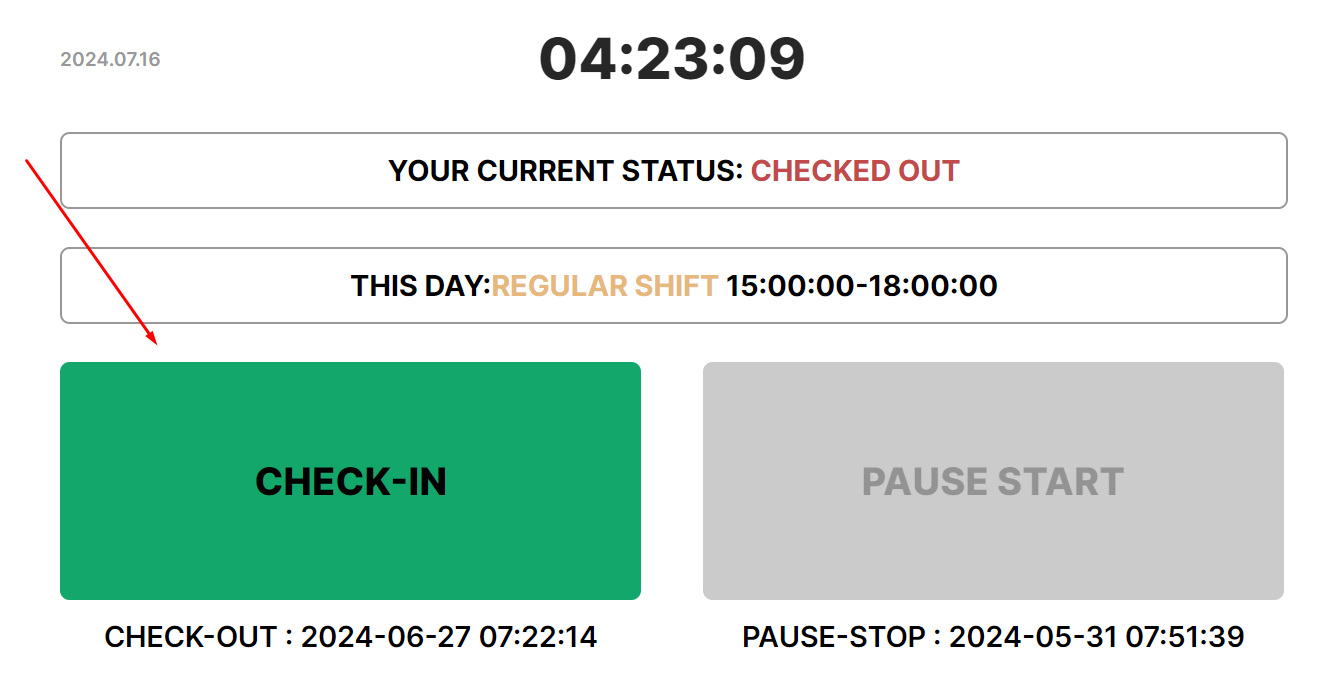
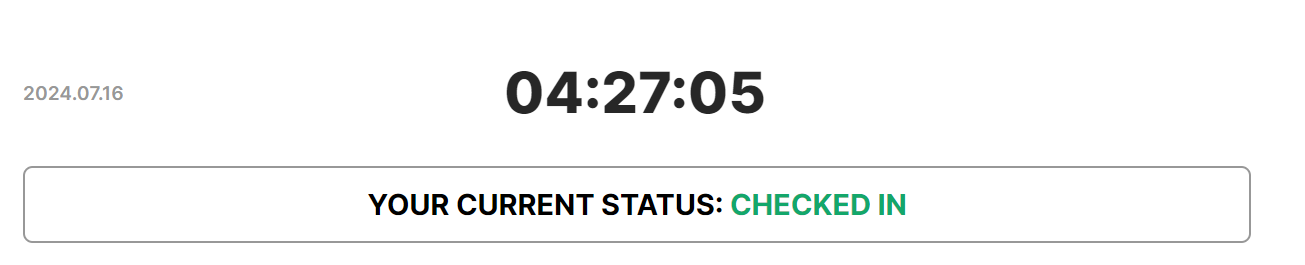
- The status will change to “Checked in”.
- If the system records being late (checking in after the start of the working day according to the schedule specified in the profile), it will ask for the reason for the delay — a comment. Enter a comment in the input field and press "Ok". If You won't fill Commentary input and press “Cancel”, Check-in won't be recorded to the system.

- If you click "Ok" when the comment is not entered (while you are late), the system will show a notification to fill in the comment.
- In the comment field, you should briefly enter a specific and truthful reason for the lateness, and this information will be submitted to the manager.

Marking the end of the work day
Perform check-out to mark the end of the working day
- The status will change to “Checked out”.

- If check-out is performed before the end of the working day specified in the schedule, the system will record early leave and request a comment. You need to enter a comment and press “Оk”.

- The status will change to “Checked out”, and an early leave mark will be added to Action History.

- If you do not enter a comment, the system will show a notification of its necessity.
- If you click “Cancel”, check-out will not be executed.
- If you are “On pause” or have not performed a check in, the “check out” button will not be available.
- You need to un-pause
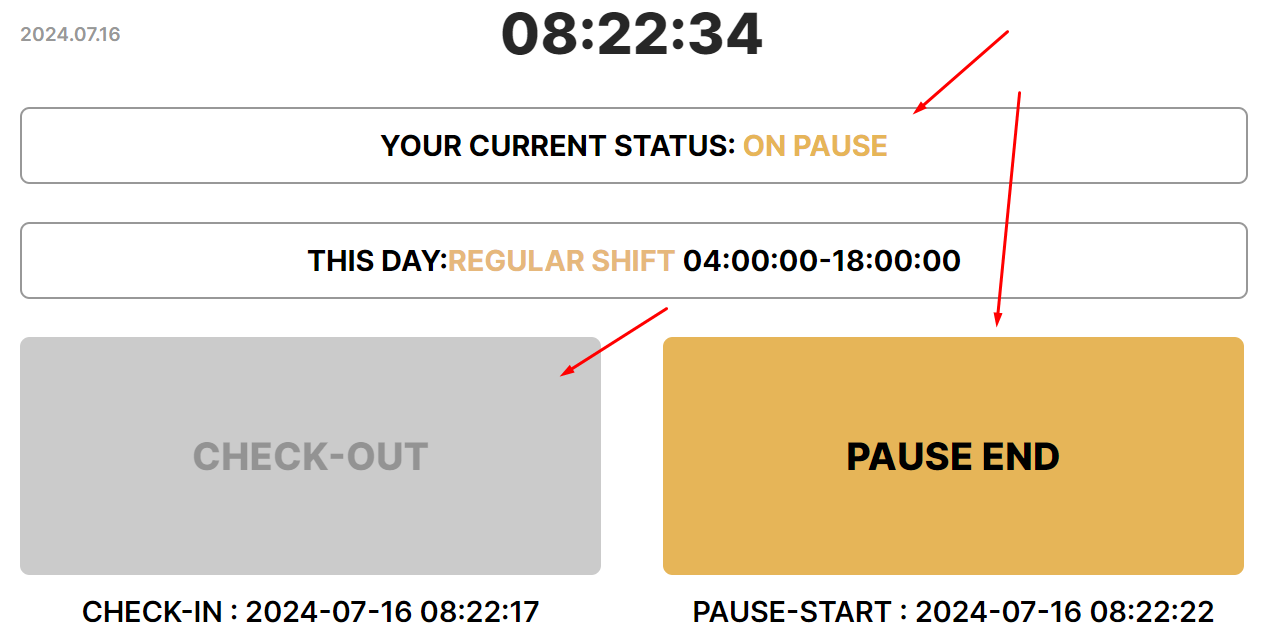
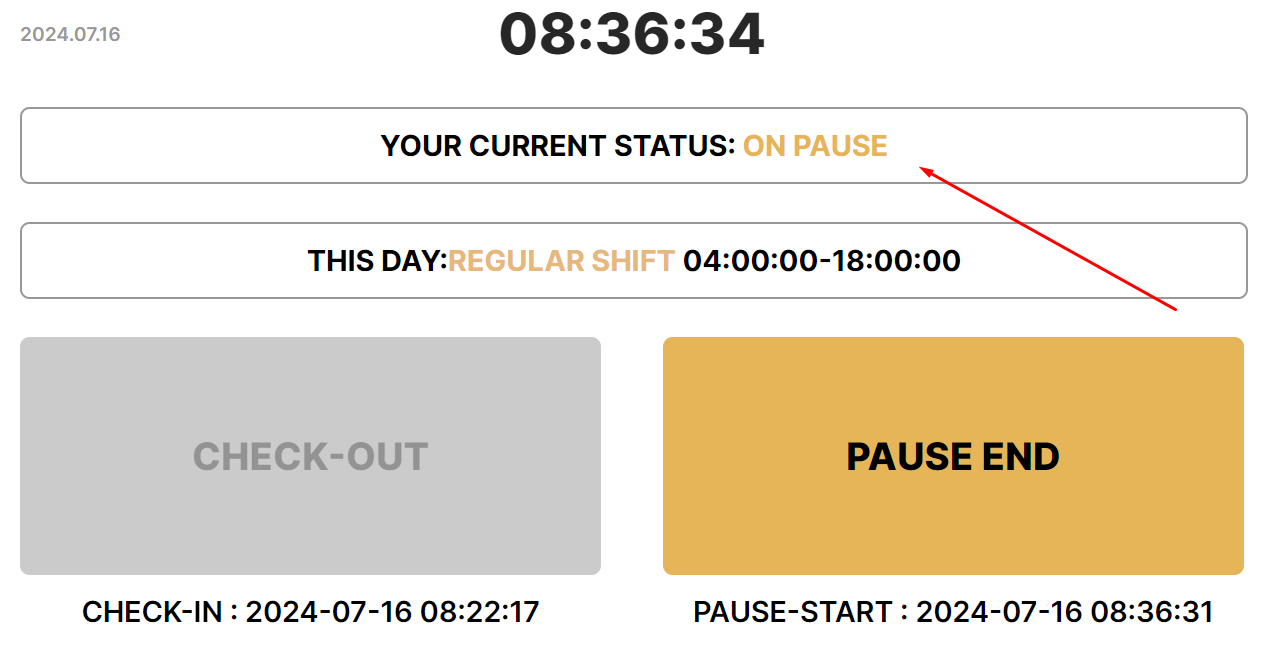
Marking the beginning of the break during work time
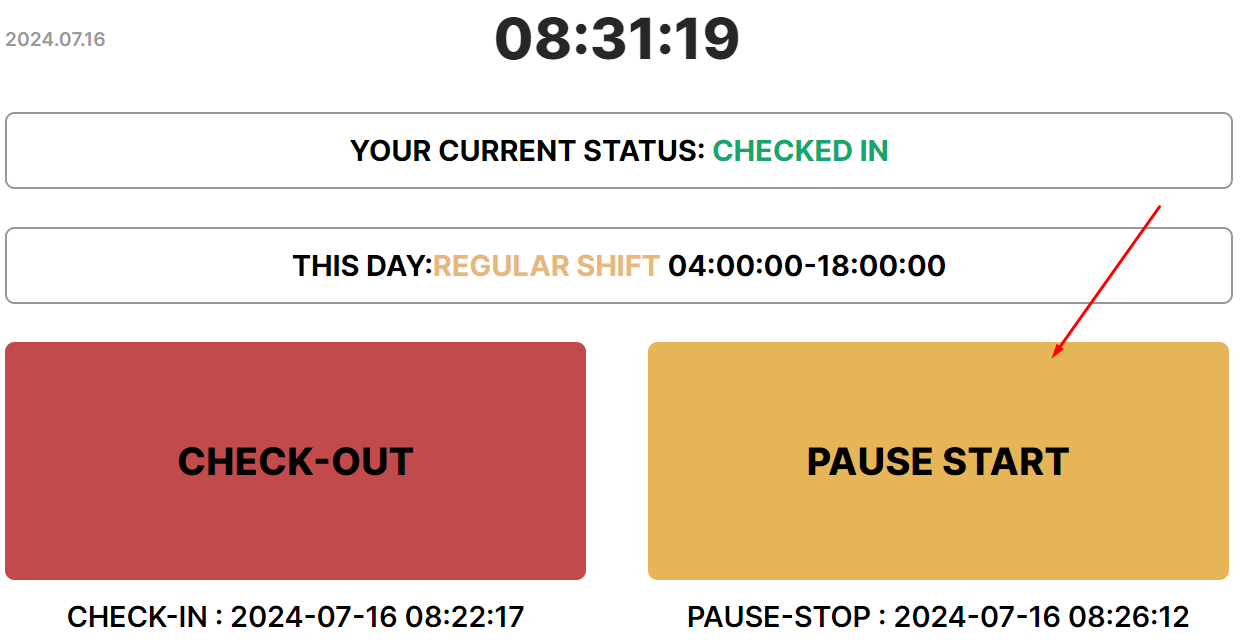
Press “Pause start” to mark a lunch break or a pause in work
- You can only start a break after performing Check-in when the “Pause start” button becomes active.
- Enter a comment if you wish or leave the field blank and press “Ok”.
- The status will change to “On pause”.
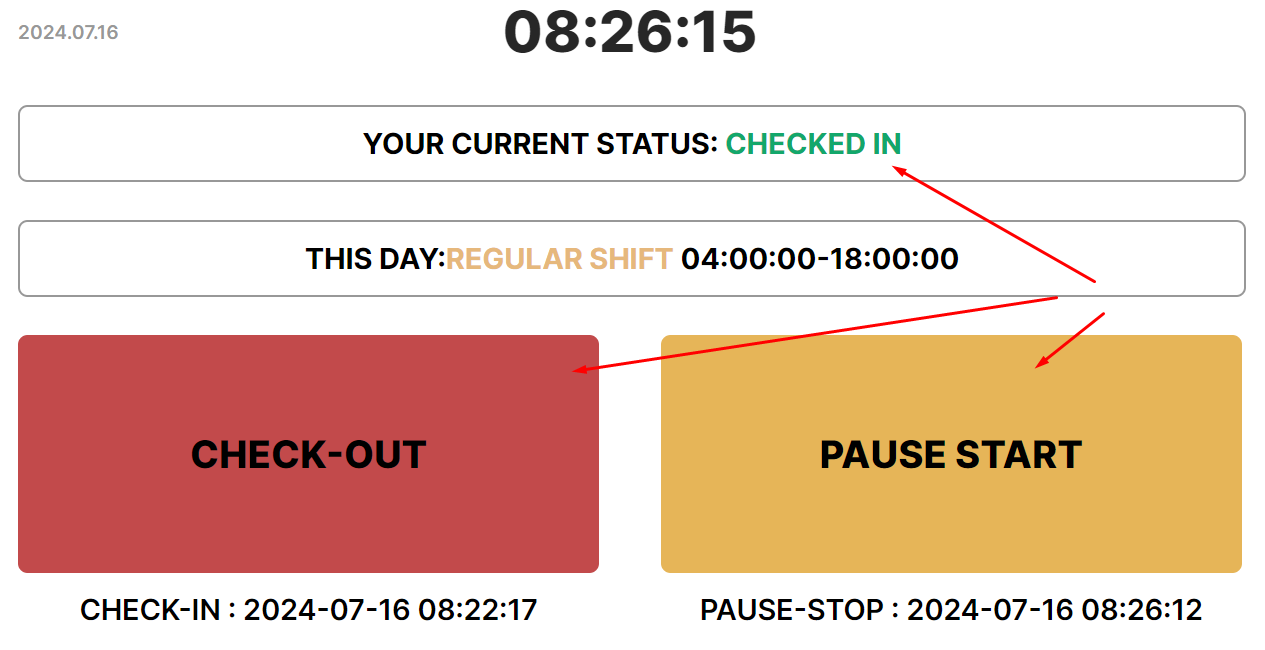
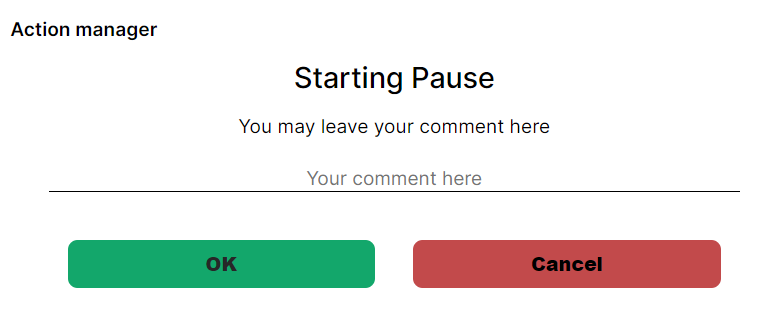
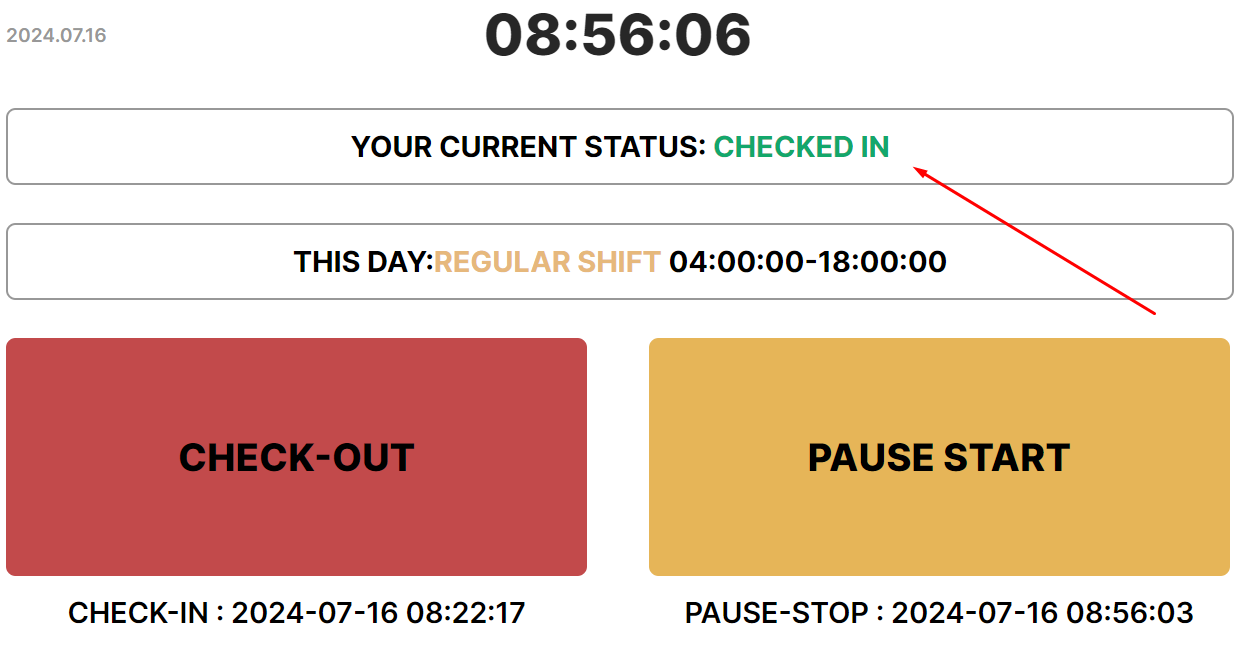
Marking the end of break during work time
Press the “Pause stop” button to mark the end of a pause
- Enter a comment or leave the field blank and press “Ok”.
- The status will change to Checked in.
User profile
The "User Profile" section lists the main user data.
The user of the Action Tracker system is responsible for the correctness of the information in this section.
- The user data window will open.
- Please contact support if you need to make any changes: support.team@a-tracker.net.
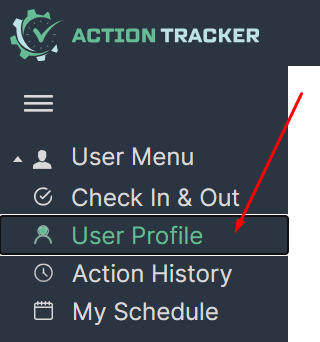
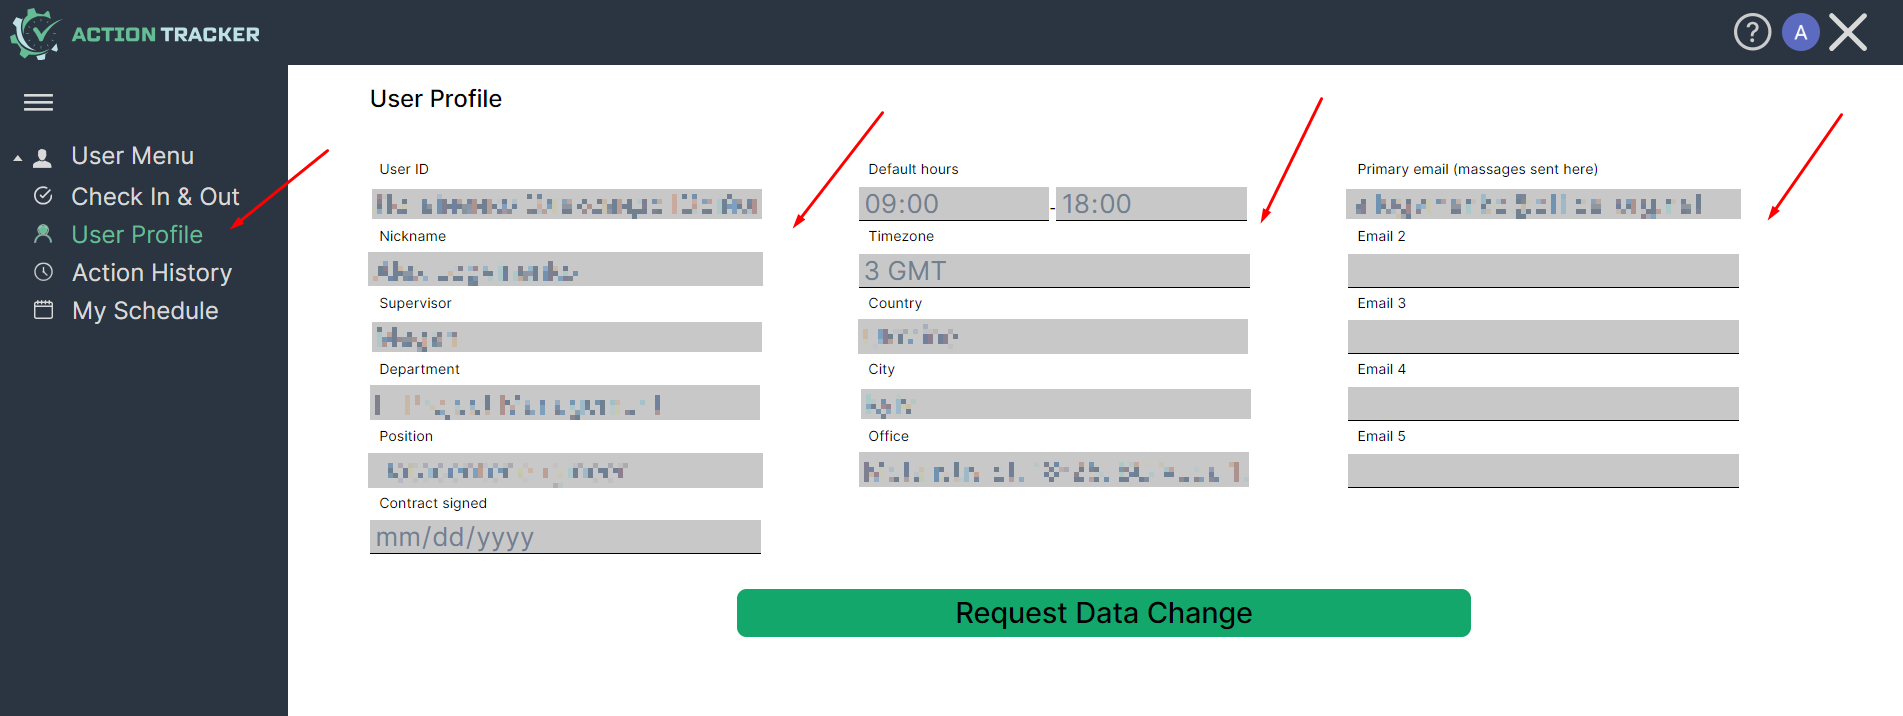
User profile interface
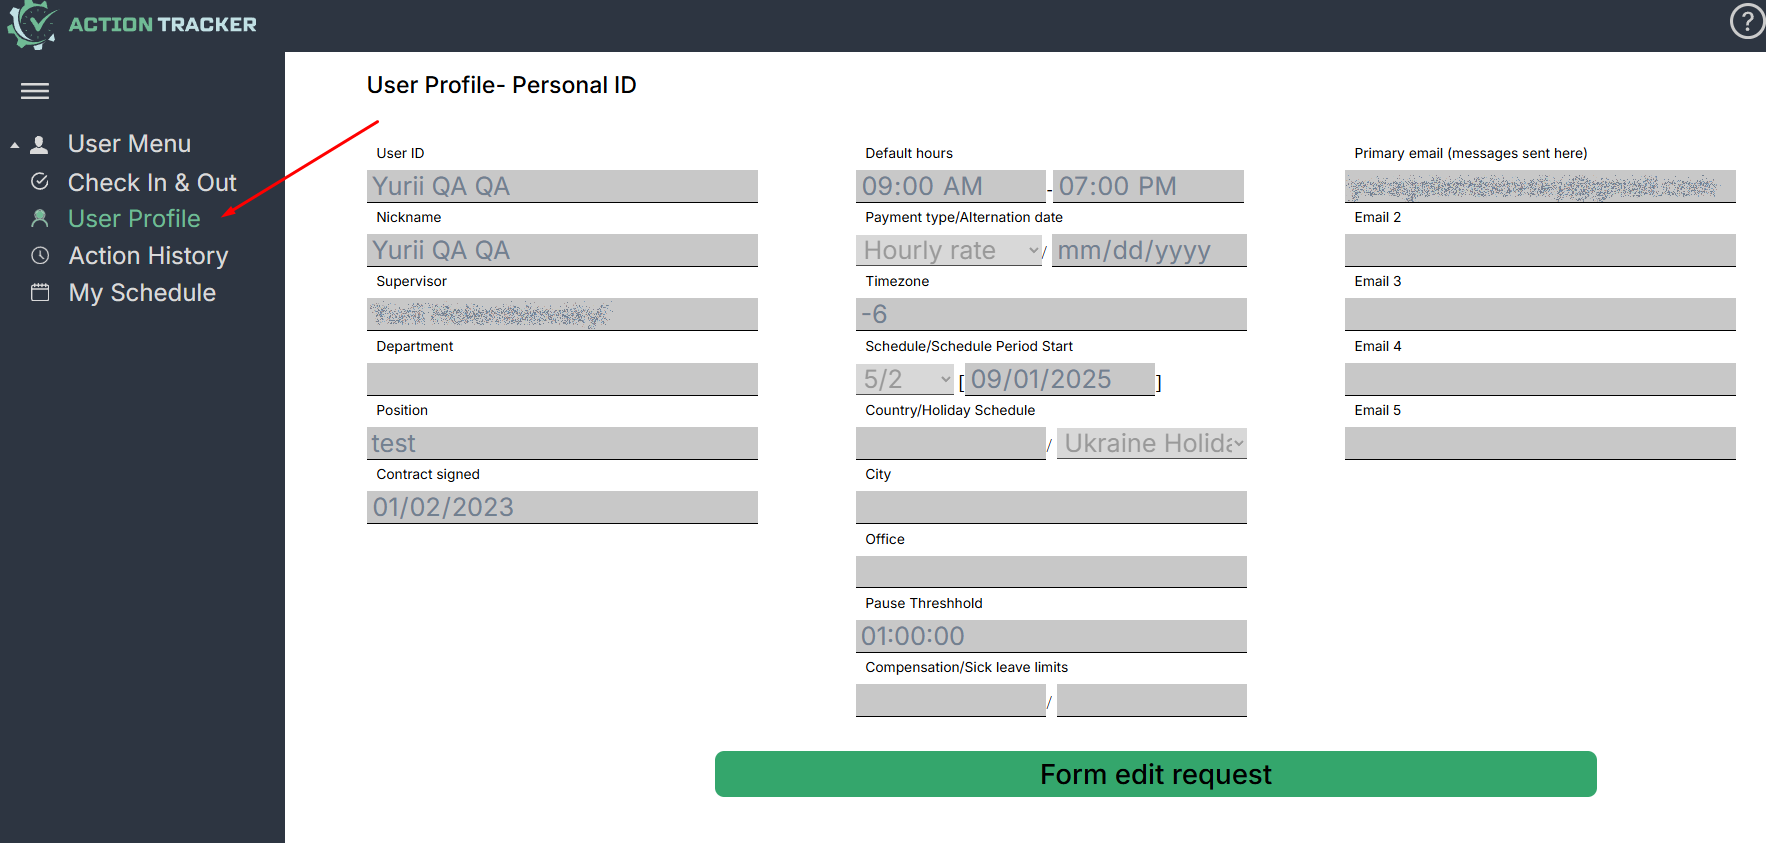
- Username & Nickname - user’s personal information
- Supervisor - your direct supervisor
- Schedule - work time schedule applicable to you
- Timezone - your timezone, should be same as your business timezone
- Country, City, Office - user’s physical location
- Emails - list of you corporate email addresses
- Position - your position within department
- Contract signed - date you have your contract signed
Request data correction
Users can send data correction requests while in the “Profile” tab if any inaccuracies have been noticed or to record any recent changes in personal or corporate data.
To send a request to the support team you need to press the “Request data correction” button first. You will see that fields have changed text color representing fields available to be changed. You are free to change any data necessary and then press the “Send request” button to finish editing. Support team will receive request via email as well as you and your supervisor. Changes won’t be displayed until the support team or your supervisor approves and record requested changes to the database.
Example is in the screenshot below
List of all the field available for editing:
- Username та Nickname
- Schedule
- Country, City, Office
- Emails
- Department, Position
Fields that will not be able for editing:
- Supervisor
- Timezone
- Contract signed
To edit a data field you need to point the cursor over the input field or select text you want to edit and perform typing new data.
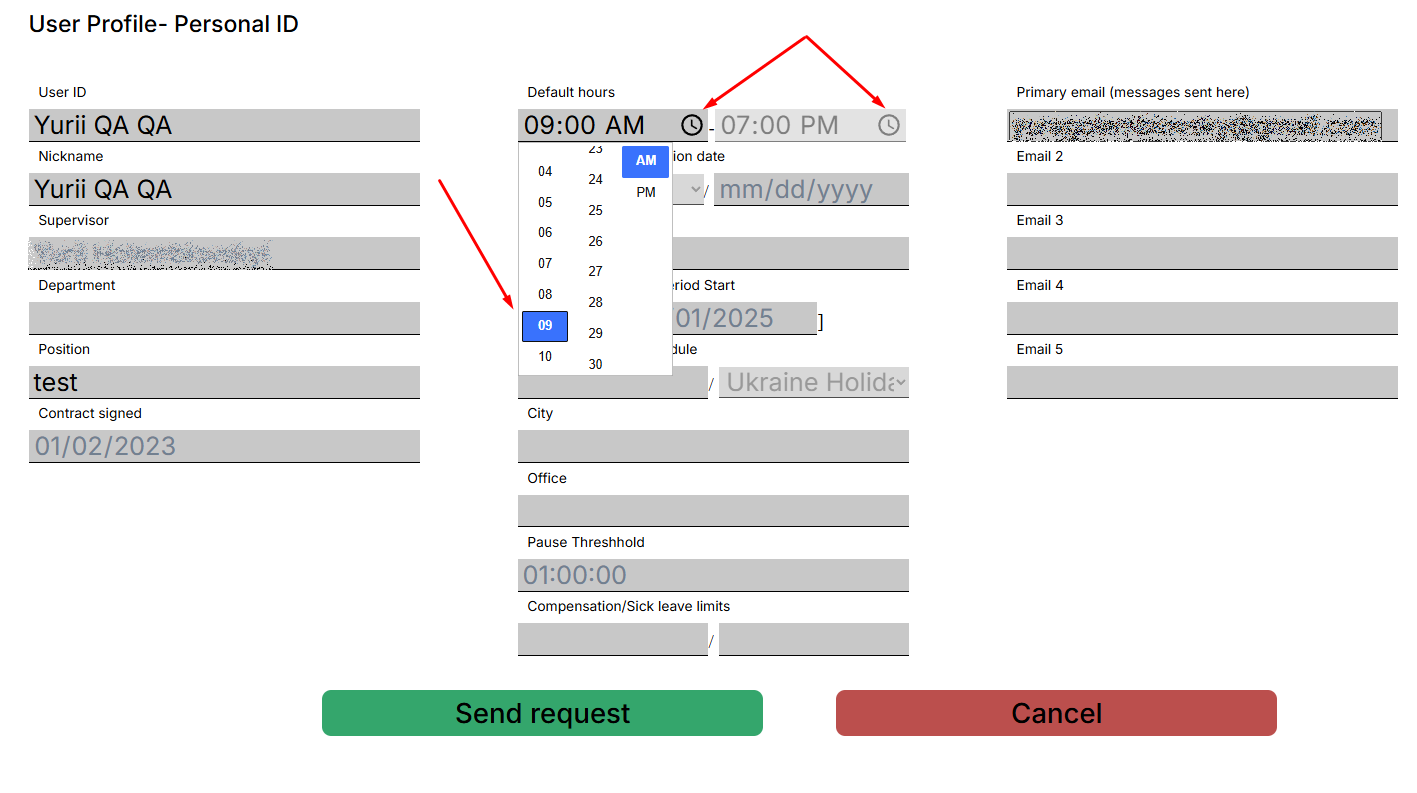
To change “Schedule” fields simply click on the clock ico and select the correct time.
(Won’t work in firefox browsers as this feature is not supported by browser)
If correction must be applied to the fields that are not available to edit please address support.team@a-tracker.net support team and your supervisor in copy.
After all editing is finished press “Send request” button. System will question you to make sure you entered the correct data, as shown on screenshot below.
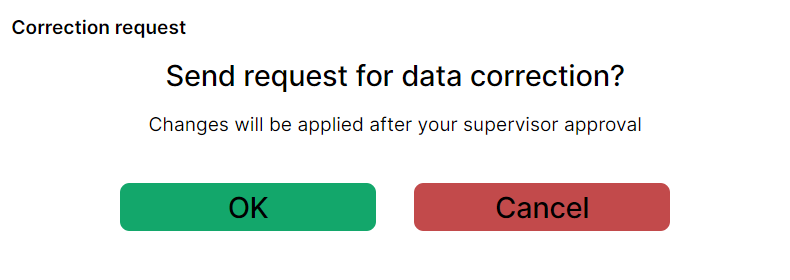
As the user presses the “OK” button, email will be sent to your supervisor, support team and a copy of email to the user.
After supervisor approval has been received by the support team, changes will be made to the user's record in the database.
After a request has been sent, the user will see the “Profile” page again. IMPORTANT: page will show old data until recent changes have been approved and applied.
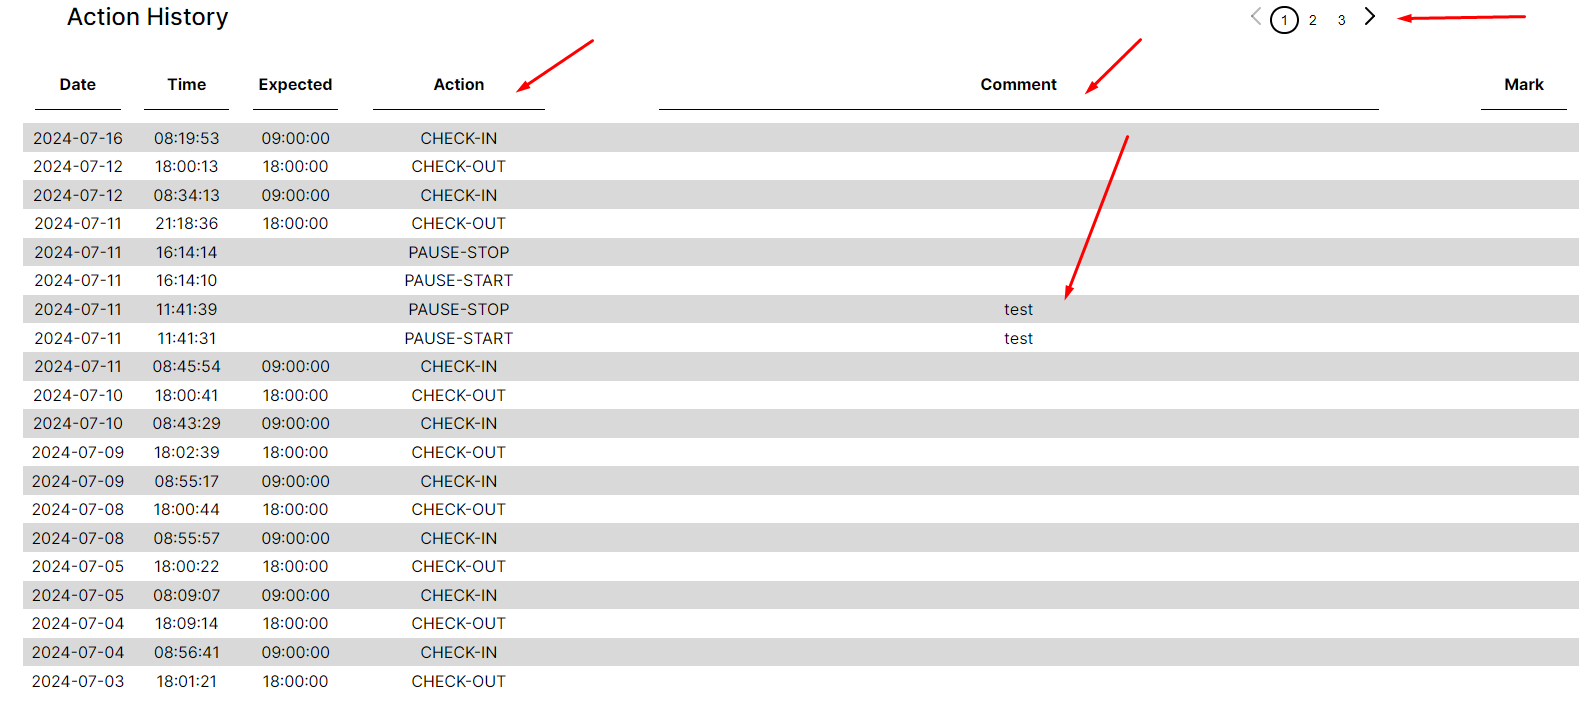
Action History
In this section, you can view your history of check-in, check-out, pause start, and pause stop
- This section shows the history of performed check-in, check-out, pause start, and pause stop actions with recorded time and comments.
My Schedule
Overview
My Schedule section is intended to plan your schedule for the near future and gives you the opportunity to
- mark days off (if your schedule differs from the standard),
- mark regular shifts,
- mark healthcare time,
- plan vacations,
- mark duty shifts,
- mark specific schedules,
- leave comments.
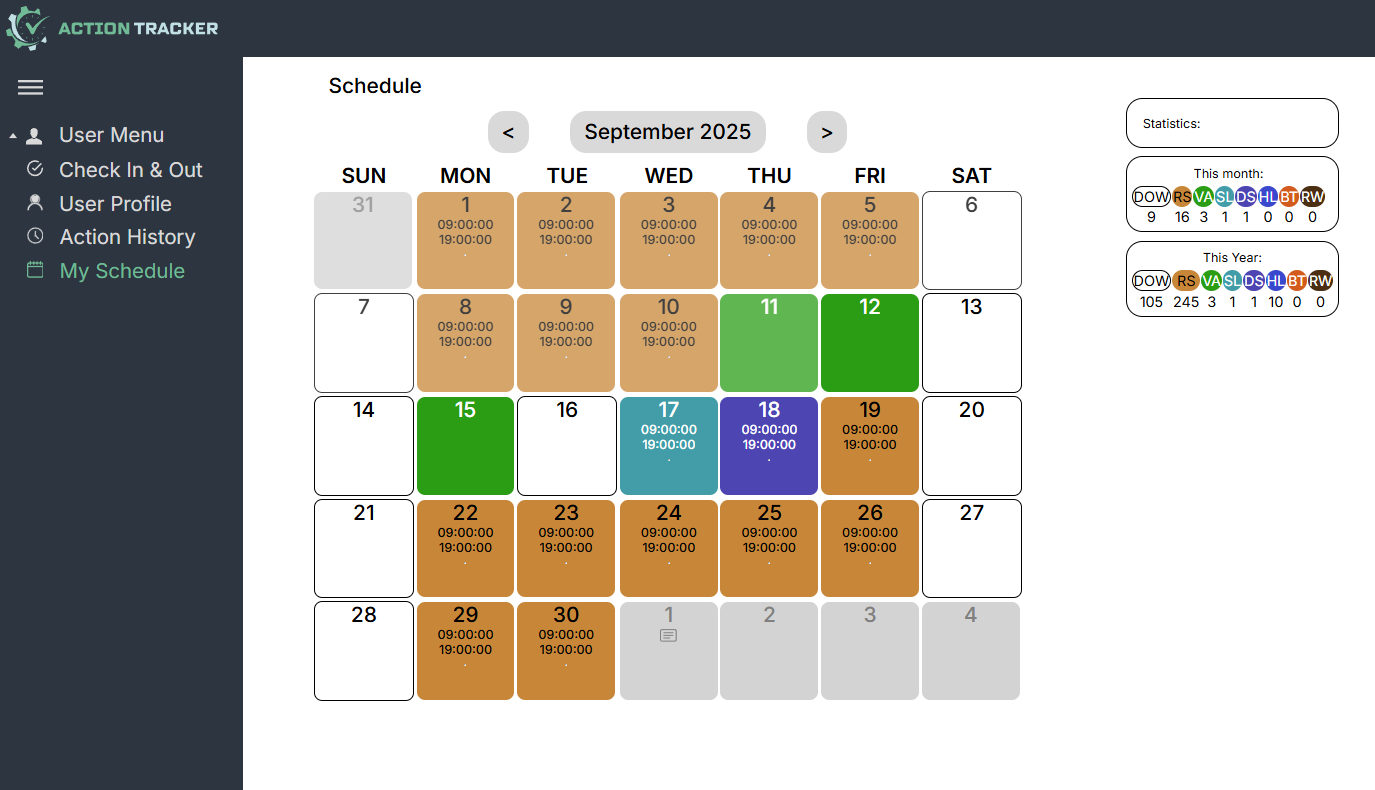
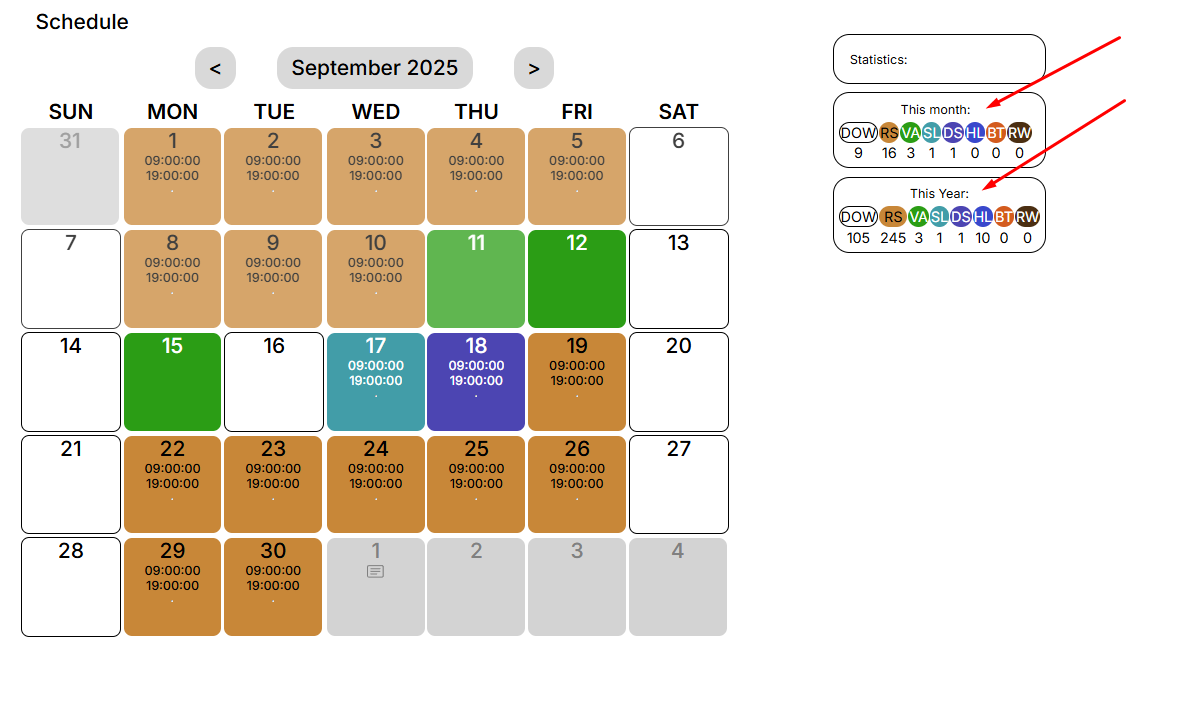
On the right are the monthly and annual statistics.
Planning your schedule
By choosing the type of days you want to schedule, you can specify the desired dates for the selected event.
To do this, you need to select the day (or days) that interest you:
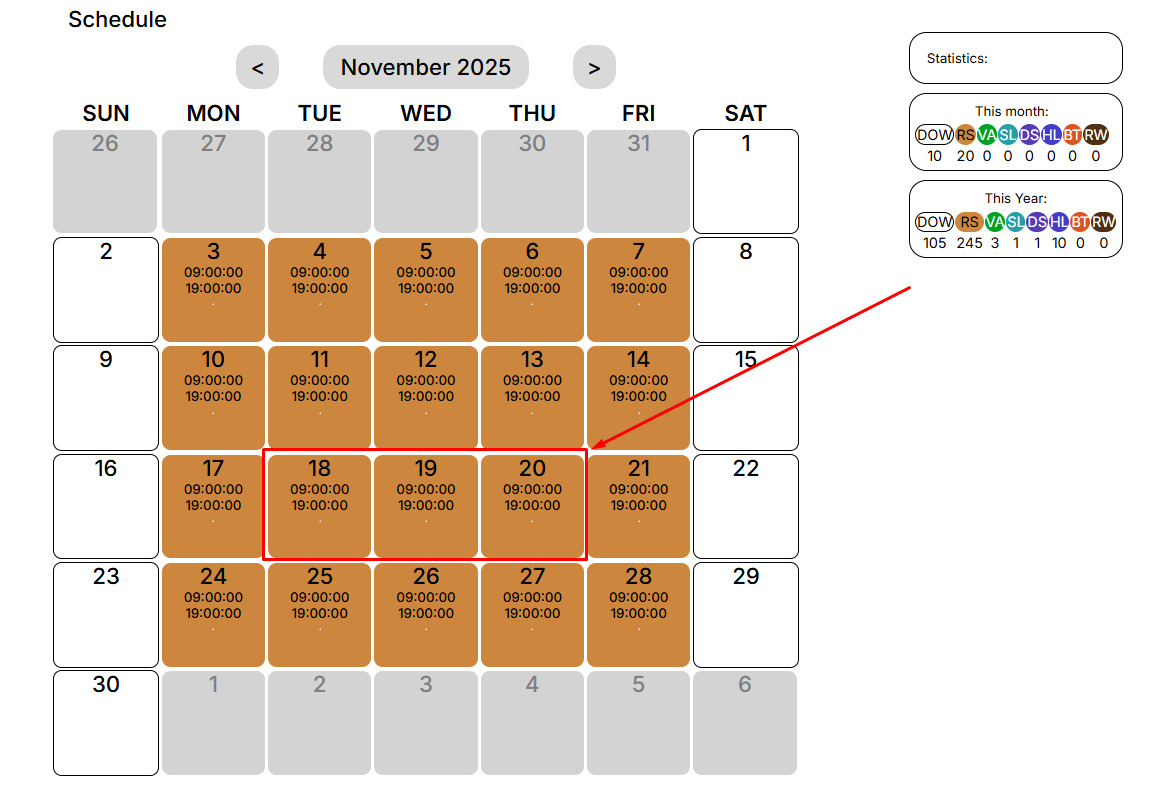
After that, an editing window for the schedule will open in front of you:
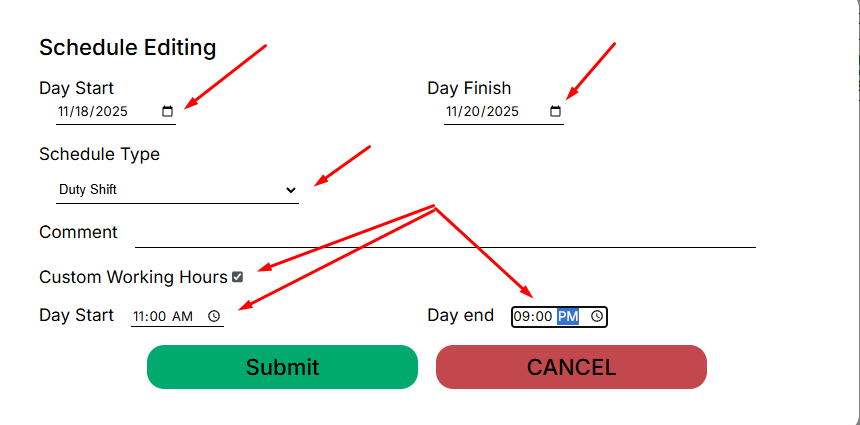
In this window, you can:
- select the days for applying a specific type of work schedule,
- choose the type of work schedule,
- leave a comment, if necessary (it will be visible to your supervisor),
-specify a non-standard work schedule (if it involves a duty shift or if you have agreed on such a schedule with your supervisor).
To complete and save the added events, click “Submit”.
To cancel the changes, press “Cancel”.
After you save the changes, you will be notified that you need to receive approval from your manager.
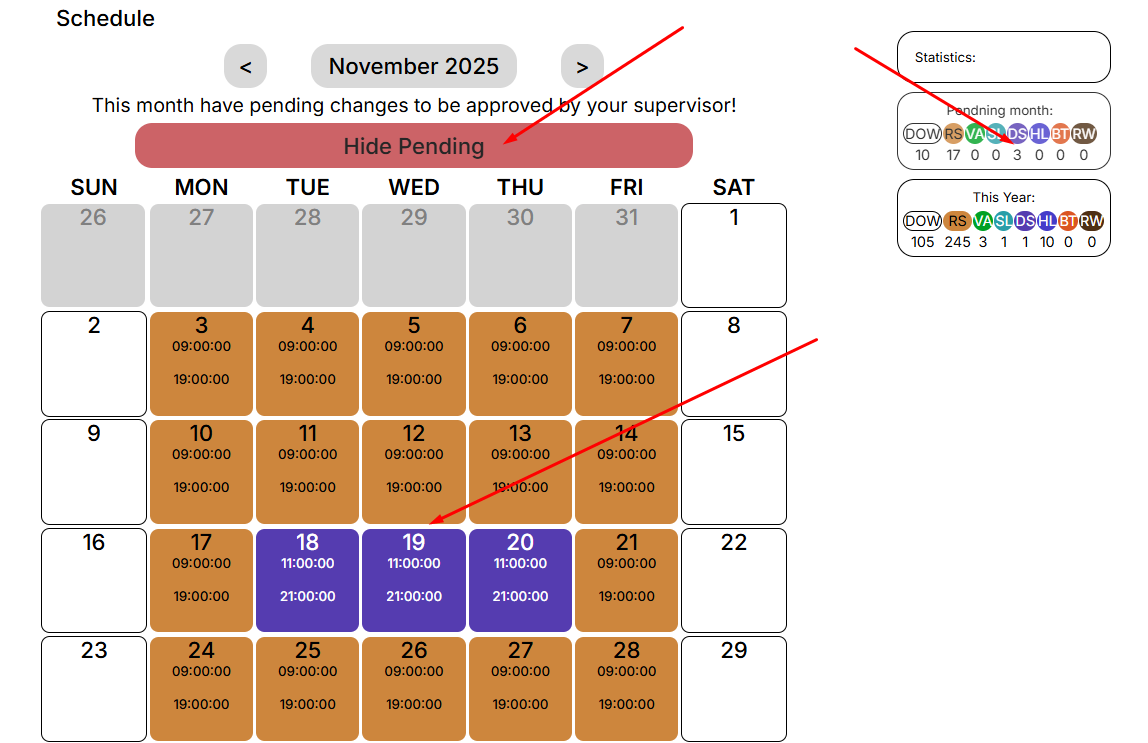
The statistics will display the number of selected days for each event.